Appearance
Getting started part 1: Upload scene by Viz4D Plugin
INFO
In this part, we’re gonna upload scene from 3dsMax to Viz4D with our plugin.
This video is a quick overview of this part (Upload scene by Viz4D Plugin):
Step 1. Open plugin and validate scene
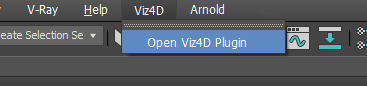
- At the main menu bar, open the Viz4D menu and click on the "Open Viz4D Plugin" item.
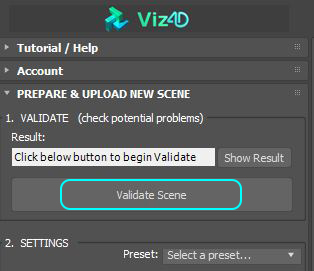
Login to your account.
Then you must click the "Validate scene" button, for Viz4D Plugin to automatically detect unsupported features and recommend a solution. It'll take a few minutes for the first validation.
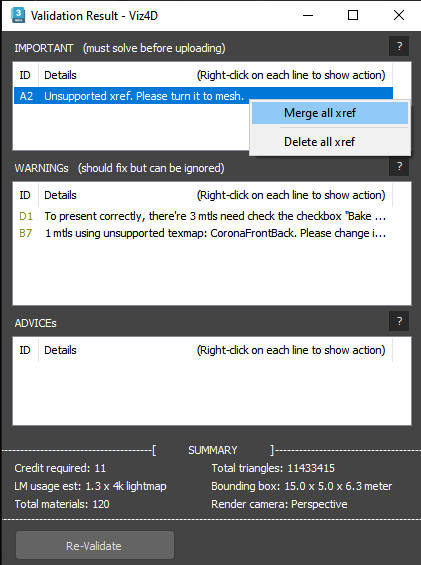
After clicking validate, a window will appear. This window has 4 sections:
- Important: Must be solved. If not you can’t upload scene to Viz4D.
- Warning: Should be fixed but you can ignore them. If you ignore it, the result might be different from the original scene, but mostly can be fixed manually later in Viz4D Editor.
- Advice: Nice to have, giving better optimization.
- Summary: Summarize information such as total triangle, required credit, etc.
Tip:
Right-click on any item to show commands that will help you solve problems quickly.
- After solving the problem, press "Re-validate" to update the status.
📢 Pick camera used for baking lightmap:
Viz4D will bake lightmap with the lighting in the active viewport. So in your active viewport, switch to the camera that you want to bake lightmap.
(Active viewport is the viewport with highlighted yellow border, you can use Alt + W to switch to single viewport layout)
If you used LightMix, follow this instructions:
- Transfer LightMix to actual lights by clicking the button "> Scene" (Corona) or "To Scene" (V-Ray).
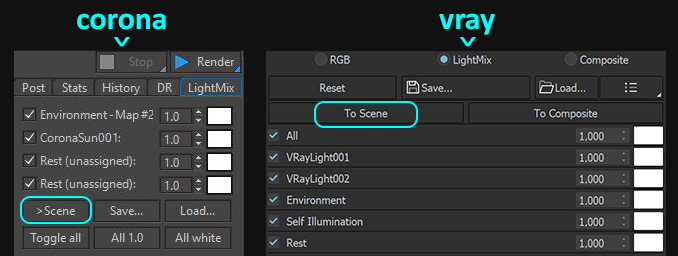
- After transfer, we suggest you turn off LightMix and re-render to guarantee the light is exactly what you want.
WARNING
If you disable any light in LightMix, you must manually turn off these lights in the scene.
:::
Step 2. Fix incorrect face orientation
Lightmap only contains lighting on the front-facing, so you must solve the incorrect face orientation.
- Click "Preview Backface" button to detect the back face easily. After clicking, all back faces are highlighted in green.
- In most cases, you need to choose the faces with the incorrect orientation and flip it:
In case where faces can be seen from both sides, use modifier "Shell" instead
- The amount of modifier “Shell” should be at least 2mm. If it’s too thin, it may causes artifact in optimized mesh.
Tiny objects (like leaves) can be ignored
For tiny objects like small leaves, no need to use Shell because small incorrect in lighting may not be noticable. Just leave it as is and in Viz4D Editor set Face rendering of object to Double Sided. However you can still use Shell if you want accurate lighting.
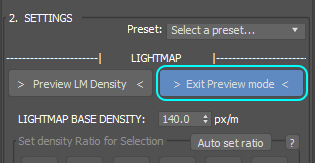
- When you fixed all back-face, click “Exit Preview mode” button.
Step 3. Set Lightmap density
INFO
Lightmap Density will determine resolution of lightmap, mesh and texture optimization. The higher lightmap density, the higher the resolution of lightmap, num triangles of mesh and texture size.
1. Set Lightmap Base Density based on your scene
Our suggestion:
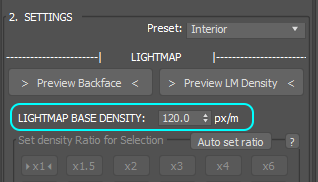
Interior: 120 pixels / meter (default)
120px/m means 1m x 1m surface area is covered by 120x120 pixels lightmap. It’s good balance between quality and performance.
For interior, if you want really high quality without caring about performance of older mobile device just set the lightmap base density to 220px/m.
Exterior: 80 pixels / meter
You should set Lightmap Base Density so that total lightmap is less than 5 x 4k lightmaps.
Note that you should set custom lower lightmap density for background/far away objects. Otherwise these large objects can consume a lot of lightmap pixels while there're no need to view these up close.
Single object: 500 pixels / meter
This pixel is calculated based on sample object with dimensions of 0.8m x 0.8m.
Note: Above suggestions assumed your scene has correct real-world scale.
Otherwise, you should either rescale your scene to match real world scale, or adjust lightmap density so that total lightmap usage is between 0.5x to 5x 4k lightmaps.
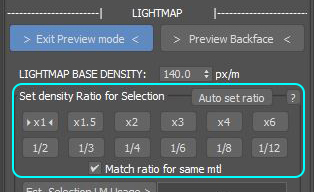
2. To have the most optimal lightmap, you can adjust custom lightmap density to prioritize for each object (called Density Ratio).
Details
The lightmap density will correspond with each option in “Density Ratio”:
- x1 = Lightmap Base Density
- x1.5 = Lightmap Base Density x 1.5
- x2 = Lightmap Base Density x 2
- ...
- 1/2 = Lightmap Base Density / 2
- 1/3 = Lightmap Base Density / 3
- ...
INFO
Viz4D Auto Ratio had automatically analyzed and decided the optimal density ratio for each object by default, but it can't understand which are important objects, so all you need to do for Density Ratio is:
- Increase Density Ratio by set to x3 or higher to increase resolution for objects that you want to see up close, or that has a hotspot, configurator.
- Decrease Density Ratio by set to 1/4 or lower to decrease resolution for unnecessary objects:
- For interior scene, the unnecessary objects are those used as background (usually outside the window, background building, road, far away cars…)
- For exterior scene, the unnecessary objects are the surrounding landscape/far away such as yard, road, mountain…
Note: Wall with many moldings should has density ratio x1 or above
For the wall or wardrobe that has many moldings, you should set density ratio to at least x1 to avoid deficient resolution of lightmap.
Result of different wall's density ratio (based on lightmap base density is 120 px/m):
TIP
After baking, if you are dissatisfied with the quality of lightmap, you can rebake the lightmap again with a different setting of Lightmap as many times as you want (free of charge). Follow this guide: Rebake Lightmap
Render setting preset:
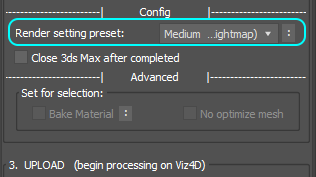
| Type | Description |
|---|---|
| Medium (default) | Baking time is fast, so sometimes the lightmap appears noisy — but you can always Rebake Lightmap to remove noise. |
| Good | Good enough quality bake for the final result. |
| Ultra | Ultra-quality bake (usually used to fix noise in the lightmap when rebaking). Note: it takes a lot of time. |
| Advanced — Keep current | Use your current render setting. |
Recommendation about lightmap:
(highly recommend) The wall, floor and ceiling should have thickness (at least 2mm) to Prevent light leaks
Using as few lightmaps as possible to decreases the loading time and memory usage. To do that, follow this guide: Reduce lightmap usage
The number of lightmaps has good performance on mobile devices should be less than 5 x 4k lightmap.
TIP
Click Est. Total LM Usage button to see the total lightmap usage estimated. Click Est. Selection LM Usage button to see the lightmap usage estimated of the selected object.
Step 4. Upload
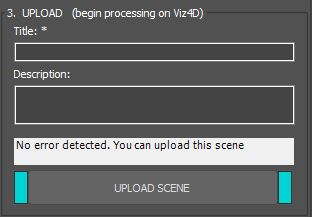
- Fill out the title and description (you can re-edit this information in Viz4D Editor).
- Please make sure you have followed the steps above, especially setting density ratio. Then click the “UPLOAD SCENE” button.
- Check all things again and click the “CONFIRM UPLOAD” button.
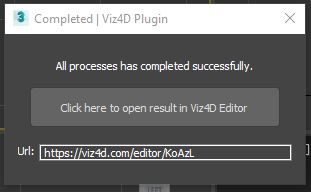
- Now, Viz4D will automatically process your scene. When the process is complete, the window below will appear and you’ll receive a notification through email. After that, you can go to part 2.
- Don’t close this Max instance while it’s processing. You can use your PC as usual, including working on other Max instances and you can even upload several scenes at the same time.
TIP
If the processing is interrupted before it is complete. Please follow this guide: Resume interrupted process in Viz4D Plugin
General Suggestions
- It would be better if your scene is at real-world scale. Some of our tools require real-world scale to operate correctly (i.e. measure tool).
- Use as few materials as possible. Similar materials should be reused. We recommend having less than 300 materials to ensure good performance on mobile. (Total materials used are written in the “Summary” section in the “Validate” window)
- Should be limited use of similar textures to MultiSubTexmap and AO because they require baking, which will make scene heavier too much.
- The mesh of objects such as grass, fur, macrame, rattan ... can not optimize much. So avoiding these meshes to reduces load time and increases interaction performance for the viewer.
- Although we support converting all types of materials, you should prioritize using simple materials. Because the results of complex materials are more likely to be different compared to the original (you can always adjust the material in Viz4D Editor later).