Appearance
Creating tour
Viz4D Tour is created by multiple cameras. It works by transitioning from camera to camera until the end.
Overview video of how to create tour:
Detailed explanation

INFO
We automatically transfer all cameras from 3dsMax to Viz4D Tour. Because of that, you will see some cameras already created in Tour Cameras.
Creating camera
Click “Add camera at current view” button to create a camera at the current position with the current camera setting.

The camera’s setting includes all properties in the “Camera” section:
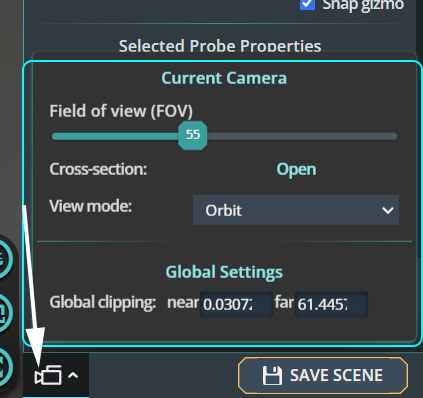
Field of view
Cross section
View mode
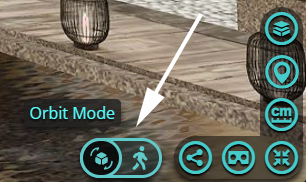
- Orbit mode: it is equivalent to orbit navigation in 3dsMax.
- Walk mode: it is equivalent to walk-through navigation in 3dsMax.
Camera clipping
TIP
💡 The first camera of the tour is also the first view when the visualization begins.
Viewing tour
When you’ve got more than one camera. Click the play button to view how tour will present to the viewer.
Updating camera position and setting
To update the camera’s position and settings, click the camera icon.
Reordering camera of tour
Drag and drop to reorder the camera of tour.
Adjusting travel time and rest time between two cameras
Adjust global setting of time
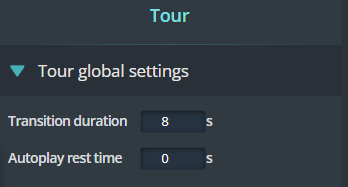
- Transition duration is the time used to transition between two cameras.
- Autoplay rest time is the break time between two cameras when autoplay is running.
Adjust time of each camera
Choose any camera then you will see the below properties appear.
When you check the checkbox, the new setting will override the global setting of time.

For reference, you can see tour of the following scenes: